
LED light sheet vs LED strip is one of the first questions many stone fabricators and contractors ask when planning backlit onyx, marble, quartzite, or translucent panels. Both methods can work, but they create different installation conditions, different hotspot risks, and different maintenance requirements.
For small details, deep cavities, edge lighting, or simple budget builds, LED strips may still be practical. For shallow stone walls, bar counters, reception panels, and large illuminated surfaces, flexible LED light sheets often provide a cleaner lighting plane and a more predictable layout. The right choice depends on the material, depth, budget, required uniformity, and service access.
Quick Answer
LED light sheets are usually better for shallow, wide, and visually critical backlit stone surfaces where uniformity matters. LED strips can be useful when the cavity is deep enough, the shape is simple, or the project needs lower initial material cost. For onyx and marble, sample testing is still required because the stone itself controls how much of the light pattern becomes visible.
| Factor | LED light sheet | LED strip |
|---|---|---|
| Uniformity | Creates a broad lighting surface with lower hotspot risk | Can show strip lines if depth or diffusion is insufficient |
| Installation depth | Useful for shallow cavities | Usually needs more distance to blend |
| Labor | Modular layout can reduce strip-by-strip placement | Requires spacing, alignment, and more wiring planning |
| Cutting | Only cut at approved marks | Cut at strip cut points, but many segments may be needed |
| Power planning | Area load and zones should be calculated | Strip wattage and run length must be calculated |
| Best use | Backlit stone, signs, display panels, feature walls | Edge details, small panels, deeper cavities, budget layouts |
Uniformity Behind Onyx and Marble
Onyx and translucent marble can reveal light source patterns more easily than opaque surfaces. A strip placed too close to the stone may create bright lines. A light sheet spreads LED points across a wider surface, so it can reduce visible striping and simplify the layout. This does not mean every hotspot disappears. The final result still depends on LED pitch, stone thickness, cavity depth, diffusion, and veining.
Use the translucent stone backlighting LED light sheets page to understand the material side of the decision. If the project is specifically onyx, review backlit onyx LED light sheets and test a real stone sample before confirming the layout.
Cavity Depth and Construction Conditions
If the project has a generous cavity depth, LED strips can sometimes blend well with correct spacing and diffusion. If the cavity is shallow, the strip pattern becomes harder to hide. LED light sheets are often chosen for shallow millwork, thin signs, or stone features where there is not enough room for strips to blend smoothly.
The construction method also matters. A stone panel fixed permanently to a wall leaves little room for later adjustment. A serviceable light box or removable frame gives the installer more flexibility. The lighting method should match how the project will be built, not just how it looks in a sample photo.
Labor and Wiring Differences
LED strips may have a lower material cost per meter, but the labor cost can rise when many parallel runs must be measured, aligned, soldered, and tested. A light sheet layout may reduce that labor because the illuminated surface is more modular. For a large wall or counter, the total project cost should include installation time, wiring, testing, rework risk, and future service, not only LED material price.
Before comparing cost, use the LED light sheet calculator or backlit stone LED calculator to estimate the illuminated area and sheet count. Then compare the complete system: LED product, driver, controller, wire, labor, access panels, and testing.
Power Supply and Voltage Drop
Both LED strips and LED light sheets are constant-voltage products in many architectural projects, so voltage drop must be managed. Long strip runs can dim toward the end. Large light sheet layouts can also show uneven brightness if the feed points, wire gauge, or zone planning are wrong. Use the LED light sheet power supply calculator and LED light sheet power supply and controller guide before final wiring.
| Problem | Likely cause | Planning response |
|---|---|---|
| Dim end | Long cable run or undersized wire | Shorter runs, thicker wire, additional feed points |
| Visible lines | Strip too close to stone | Increase depth, add diffusion, or use light sheet |
| Uneven stone color | Stone density or veining variation | Test real material and adjust layout |
| Controller overload | Too much current on one channel | Split zones and match controller rating |
When LED Strips Still Make Sense
LED strips are not wrong. They can work well for smaller accents, edges, coves, deep light boxes, budget mockups, and projects where perfect uniformity is not the main goal. A strip layout can also be easier to source locally for simple jobs. The issue is using strips in a shallow, high-visibility stone feature and expecting a luxury result without testing.
When LED Light Sheets Are the Safer Choice
Choose LED light sheets when the panel is wide, shallow, visually important, or difficult to rework after installation. They are especially useful for backlit stone walls, hotel features, reception desks, bar counters, retail displays, and signage where the customer expects a smooth illuminated surface.
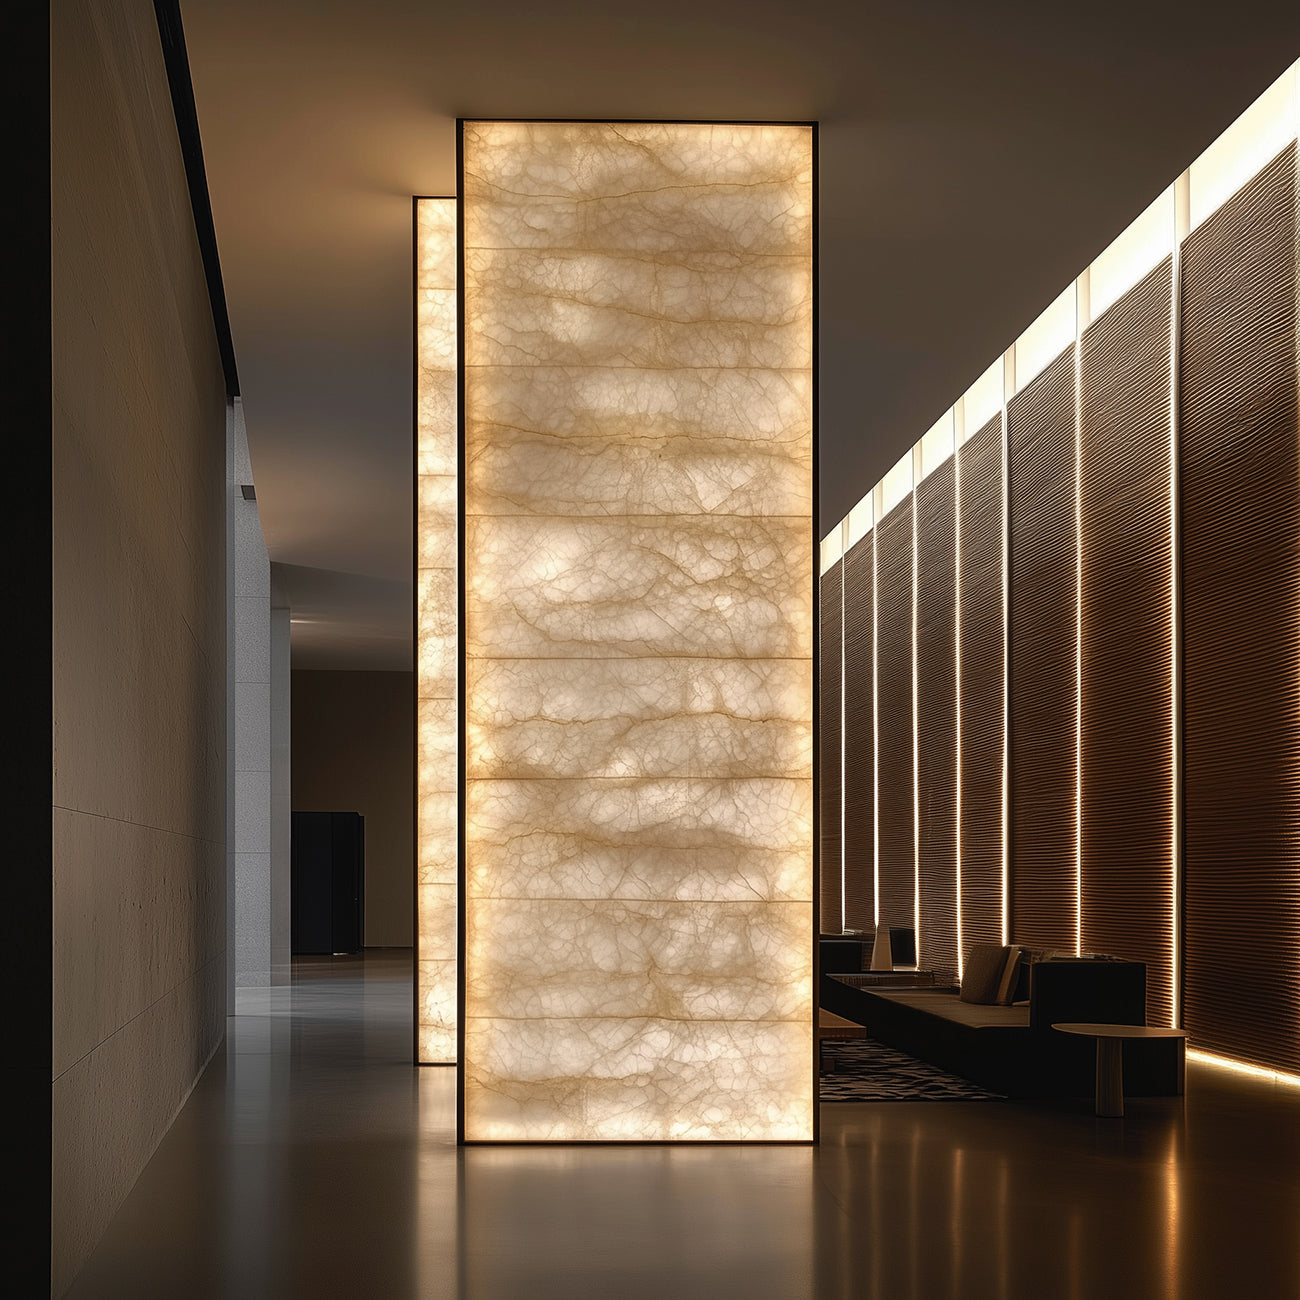
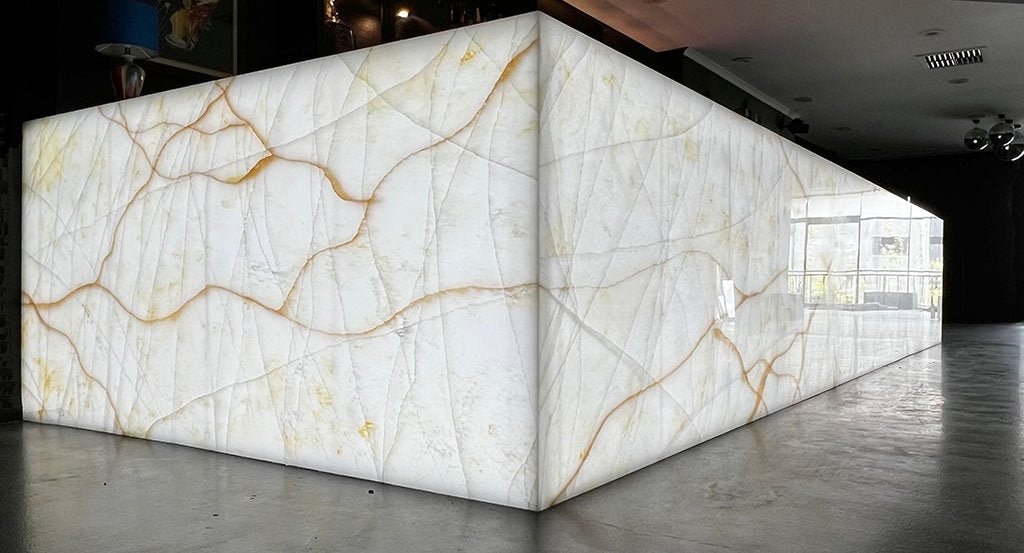
Reference Images for Planning Discussion
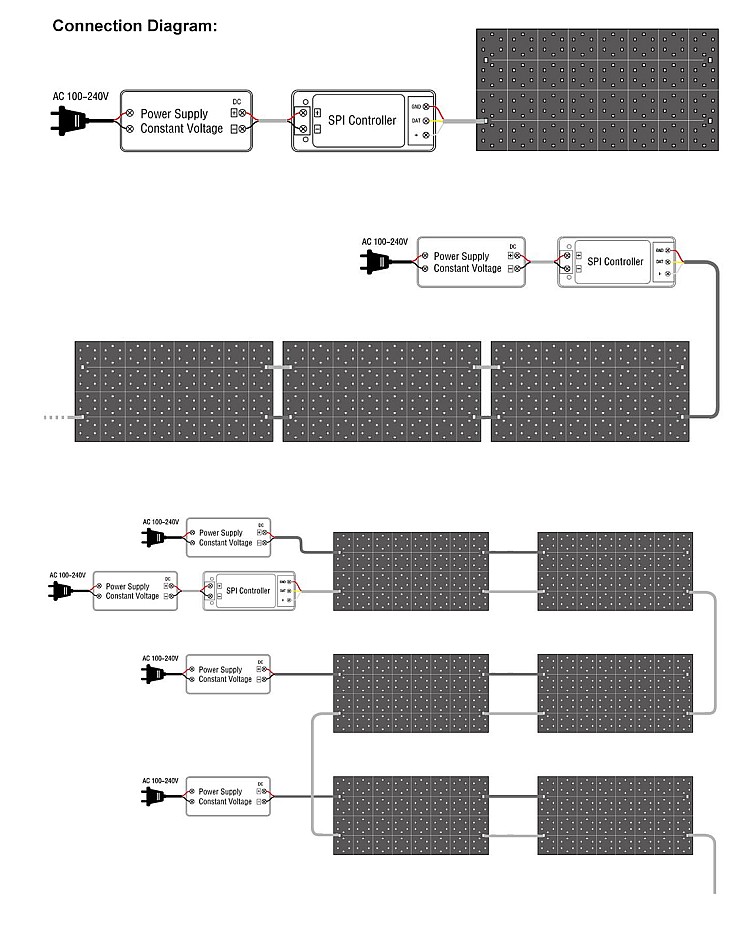
The following reference diagram helps compare system complexity. Use it for discussion only; final wiring must follow the selected JJS product, driver, and controller plan.
FAQ
Are LED light sheets always better than LED strips?
No. LED light sheets are often better for shallow and uniform backlighting, but LED strips can still be suitable for deeper cavities, smaller features, and simple budget layouts.
Can LED strips backlight onyx?
Yes, if the cavity depth, spacing, and diffusion are suitable. The risk is visible striping or hotspots when the strips are too close to the stone.
Do LED light sheets need less power than LED strips?
Not automatically. Power depends on wattage per area, brightness target, and layout. Compare the complete system rather than assuming one method always uses less power.
How should I choose for a real project?
Start with material, visible size, installation depth, and service access. Then use the backlit stone LED calculator and send drawings through the request a custom LED light sheet quote page.
If your project involves onyx, marble, quartzite, or translucent stone, compare the total system before buying. The LED light sheet calculator can help estimate quantity and load, and the request a custom LED light sheet quote page is the best next step for drawing review.
Same-Condition Comparison: LED Light Sheet vs LED Strip Behind Translucent Stone
If the project is important, compare LED light sheets and LED strips under the same conditions before final specification. Do not compare a well-spaced LED sheet sample against an LED strip sample with a different stone, different cavity depth, or different color temperature. That kind of test can lead to the wrong purchasing decision.
The following method is recommended when no final site test data exists yet. It does not replace final site review, but it can make the decision more objective before bulk order or installation.
| Test item | Keep the same for both samples | What to observe |
|---|---|---|
| Material | Same onyx, marble, quartzite, acrylic, or diffuser sample | Transmission, vein brightness, color shift, and dark minerals |
| Cavity depth | Same distance from light source to stone back face | Hotspot visibility, edge shadow, and overall softness |
| Color temperature | Same CCT or same RGBW setting | Stone tone, warm/cool preference, and color consistency |
| Power condition | Correct voltage, safe wiring, comparable loaded condition | Dim ends, voltage drop risk, heat behavior, and driver sizing |
| Viewing condition | Same room light, viewing distance, and camera exposure | Whether the result looks acceptable to the designer and buyer |
Record the observations in plain language: visible hotspots, dim edges, wiring complexity, heat concerns, maintenance access, and whether the sample still looks good under normal room lighting. If both options look acceptable, cost, lead time, installation labor, and serviceability can decide the final specification.
How to Make the Final Decision
A practical decision should begin with the project drawing and the real material sample. If the design has a shallow cavity, a large visible face, and a high-end interior requirement, LED light sheets should be tested early because they may reduce installation risk. If the project has a deeper box, a small illuminated area, or a budget-driven specification, LED strips may still be acceptable when spacing and diffusion are planned correctly.
The best comparison is not a product-to-product argument. It is a system comparison. Ask how many labor hours are needed, how many solder joints or connectors will be hidden, how easy it is to replace a failed driver, whether the stone can be removed later, and whether the client will accept visible brightness variation. These questions usually reveal the better method faster than a simple price comparison.
| Decision signal | Usually favors |
|---|---|
| Very shallow cavity | LED light sheet |
| Deep light box with simple geometry | LED strip |
| Luxury stone wall with strict visual expectation | LED light sheet |
| Small edge detail or accent line | LED strip |
| Difficult service access after installation | The system with fewer hidden failure points |
Engineering Decision Table: Choose the Lighting Method by Project Constraint
For backlit onyx and translucent marble, the best choice is rarely based on product price alone. A stone wall, bar face, reception desk, or luxury kitchen island has several constraints at the same time: cavity depth, slab translucency, visible seams, service access, dimming expectations, and the installer's ability to build a repeatable grid. Use the table below as a first screening tool before you quote the project.
| Project condition | LED light sheet usually fits when… | LED strip usually fits when… | Engineering note |
|---|---|---|---|
| Shallow cavity behind stone | The build-up is tight and the design needs a broad, even light plane. | The cavity is deep enough to diffuse strip lines before the light reaches the stone. | With translucent stone, a shallow cavity makes point sources and strip rows more visible. |
| Large wall or counter face | The installer needs modular sheets, consistent spacing, and predictable feed points. | The layout is simple, the cavity is serviceable, and strip rows can be kept consistent. | Large surfaces should be reviewed as zones, not as one oversized load. |
| Irregular cutouts or logos | The sheet model has approved cut marks and the cut plan can avoid circuit damage. | Strip channels can follow the shape without tight bending or visible shadow lines. | Do not assume every sheet can be freely cut; confirm the actual cut map. |
| Budget-first mockup | The owner wants to evaluate a cleaner high-end result before final procurement. | The project is a simple prototype or low-risk display with enough depth. | A cheaper first quote can become expensive if rework is needed after stone installation. |
| Maintenance access | Feed points, drivers, and controllers can remain accessible outside the finished stone area. | The strip channels and connections remain reachable after installation. | Any buried driver, controller, or joint can turn a small electrical issue into a stone-removal job. |
Typical Layout Difference Behind a Translucent Stone Slab
Power and Zone Planning Before the Final Quote
Both systems still need proper low-voltage planning. The question is not only total watts; it is where the current flows, how long each cable run is, whether the dimmer or controller can carry the channel load, and whether each serviceable zone can be isolated later. Before final production, estimate the LED area with the LED light sheet calculator, then size drivers with the power supply calculator.
Step-by-Step Selection Workflow
- Confirm the material sample: onyx, translucent marble, quartzite, resin panel, acrylic, or another translucent surface.
- Record slab thickness, target brightness, cavity depth, and whether the surface is a wall, counter, bar face, sign, or light box.
- Decide whether the visual priority is maximum uniformity, lowest initial cost, easiest field repair, or lowest construction depth.
- Compare LED strip row spacing against LED light sheet coverage using a small physical mockup whenever the stone is expensive or visually critical.
- Plan power zones, cable exits, controller type, dimming method, and service access before approving the stone support structure.
- Send drawings, target dimensions, photos of the stone sample, and control requirements through the custom LED light sheet quote form before production.
Common Specification Mistakes
- Choosing LED strips only because the unit price looks lower, then discovering the cavity is too shallow to hide row shadows.
- Choosing LED sheets without confirming cut marks, module size, feed direction, and how the installer will route wires.
- Using one large driver or controller channel where smaller serviceable zones would reduce voltage-drop and maintenance risk.
- Assuming a stone sample will glow like an online photo; real translucency, veining, thickness, and resin backing can change the result.
- Approving the millwork or stone support frame before confirming driver location, controller access, and cable exits.
Additional FAQ for Buyers and Contractors
Is an LED light sheet always more uniform than an LED strip?
Not automatically. LED light sheets often make uniformity easier because the light sources are distributed across a wider plane, but the final result still depends on material translucency, sheet pitch, cavity depth, diffusion, voltage drop, and installation quality.
When is an LED strip still a good choice?
An LED strip can be practical for deep cavities, narrow edge details, simple light boxes, prototypes, or projects where a channel system can be serviced easily. It becomes riskier when the stone is shallow, highly translucent, or very sensitive to row shadows.
Should I compare the two systems with the same stone sample?
Yes. If the stone is expensive or the project is highly visible, compare both systems behind the same material sample. Online photos are useful for reference, but they do not replace a mockup with the real stone and intended cavity depth.
Can one power supply run a full backlit stone wall?
Sometimes, but large walls are usually safer when divided into zones. The decision depends on voltage, total wattage, cable length, wire gauge, controller rating, service access, and local electrical requirements.
What should I send for a project recommendation?
Send stone type, slab thickness, target dimensions, cavity depth, photos of the stone sample, expected color temperature or RGBW requirement, dimming method, drawing files if available, and any site constraints for power supply and controller access.